Totally Shameless Plug

My usual readers know that I have been doing my best to lose weight and get stronger since last summer. All my hard work has really paid off. I went from 198 lbs (90kg) to 137lbs (62kg) using two fitness systems.

Now, I don’t huff and puff around the shop. Using the plane for a long time does not bother me or my back. My chainsaw no longer strains my back, and my range of motion has really increased along with my ability to stay focused and energy level.

To do this, first I used Beachbody’s Power 90 which I finished in January and right after that, I started P90X. I have had great success with both of these programs along with using Shakeology.

I was so pleased about my results, I became a Beachbody Coach because my body became living proof that these systems really work. No gimmicks, no fad diets, just sensible eating, Shakeology, and being committed to “push Play” six days a week. I am 49 years old with my athletic college body back, and I am as strong as ever and getting better every day.

Tony Horton inspired me to do great things and I have done a great thing. I have a new lease on life and a new outlook. Here is a short video I made about my weight loss journey:

http://www.youtube.com/watch?v=iJqOs5Mtr7g

Now here’s the plug…… Do you want to change your life? Do you want to get rid of those extra pounds, feel more energized, feel strong and ready to take on the world and that biggest job in your shop? I can really help you do that along with Beachbody’s fitness programs. They have something from beginners to people who want to crush it with P90X2, Les Mills Combat, and Insanity.

I am inviting you for a new lease on your health and life. You can contact me at yaakov763@yahoo.com

……END OF SHAMELESS PLUG……. BEEEEEEeeeeeeeeeeeepppppppppp

Posted in Who or What Inspires you | Tagged , , | 3 Comments

Inlay complete!

Every feel like Heaven is conspiring against you? I feel that way about this project. Between the freezing temperatures, house guests, holidays, kids events, and other work related stuff, I feel like I can’t get anything done in a satisfactory time period for this project. But at least I got a couple of important steps completed.

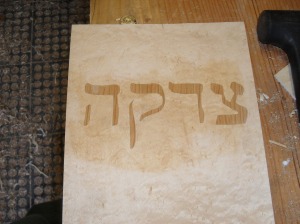
The inlay work went along pretty smoothly once I got started. My first two tests were total failures, then I figured out what I was doing wrong and test #3 was a success. Once I had everything dialed in, inlaying the Hebrew letters went along very smoothly and it looks nice. Sorry, but I am not going to got into detail about how I did the inlay work. I will say that I did use the double bevel marquetry technique that I learned from David Marks. He has a very good DVD that explains the process, and I would rather you learn it from a Master and not me.

Preview of the inlay

Preview of the inlay

Once the inlay was completed, I put the hole in the back side of the box for the money to come out, and I made the two components for the French cleat. Next step, sanding. Then it will be time for a sun bath! Yup, a sun bath for the cherry to darken it up naturally. I will put the exposed pieces in the window or outside for a little natural tan. Cherry takes on a lovely color when exposed to sunlight and that will increase the color contrast. (of course the finish will help make the cherry get darker too)

After that is complete, I think this will be one of those projects that needs to be finished before the project is assembled. More on that later.

Posted in In Yaakov's Workshop | Tagged , , , , | 4 Comments

One power tool I am very happy to have


Now that the veneering work is done, it is time to prepare the material that will become the inlay. For this project, I am going to inlay the Hebrew word tzedakah on the front panel of the tzedakah box. Technically, what I am doing is not marquetry because I am not making a picture with wood, and it is not really parquetry because I am not making geometric patterns in wood. I guess you could say that I am creating an inlay using a double bevel marquetry technique that I learned from David J. Marks three or four years ago.


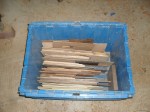
My box of wood to use for marquetry and inlay

My box of wood to use for marquetry and inlay

So before I can begin the scroll saw work to create the inlay, I must have the material for the inlay itself. I have a box of scraps that I keep just for such occasions. It is filled with all sorts of woods that I might need one day for projects like this.


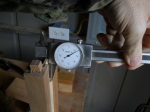
Checking the thickness of the panel

Checking the thickness of the panel

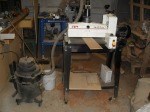
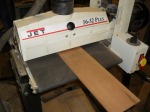
I want the inlay material to be the same thickness as the material I am setting the inlay into. Using my dial calipers, I determined the thickness of the panels, then I found a couple of pieces of cherry that were a little bit thicker. Now is the time I am very grateful for my Jet Drum Sander. With the Drum Sander, I can make just about any thickness of veneer. Man o’ man I would hate to have to get this material to thickness with a plane. I know I could do it, but the savings in time makes using a hand plane cost prohibitive for the customer with time and materials commissions.

The part of the drum sander that sucks. Really!

The part of the drum sander that sucks. Really!

lovely cherry stock

lovely cherry stock


After I finished the getting the inlay material to the correct thickness, it was time to work on drawing out the four Hebrew letters that I will be using as my template. It did not take too long to do that. Now we get to the challenging part.

Before I start the scroll saw work, I need to practice on my test board. From a previous blog, you know that I made a test sheet of material with veneer on it. I had a bunch of pieces all clamped up for 24+ hours, so my test piece was the first one I took out of the clamps. When I opened it up, my heart simply sank. The veneer bubbled up in waves that looked like dunes. Sh*t! I was afraid to open up the clamps on the real pieces. All that work for nothing! But wait! Lo’ and behold, both the back and front panels were perfect! Not a single bubble. I think I used too much glue on the test piece and did not clamp it as well as the other pieces. At least there is enough space on the test board to at least run some simple tests.

Oh well, as the great Willy S. said, “All’s well that ends well”. We’ll go for a scroll the next time we visit.

Posted in In Yaakov's Workshop | Tagged , , , , , | 1 Comment

You know what sucks?

I frequently find myself telling people that I pretty much have every piece of equipment that a woodworker could want. Of course, you can never REALLY have enough tools. And if you believe you do have everything you need, or want, then you are just fooling yourself. No woodworker could possibly resist another great tool.

Well, lately I have found myself wishing for something that I simply don’t have the money for right now. And you know what, it sucks! That’s right. It flat out sucks. You do know that I am talking about a vacuum press right?! After all, you knew that I have been working on veneering lately.

The first time and second time I used veneer for a commission, I was not pleased. I used an iron on cherry veneer. Unfortunately, the adhesive was not very good, and I got a couple of bubble ups. They were very difficult to correct and that pretty much swore me off veneer. This project forced me to look at veneering again, so this time I got a veneer that you glue on yourself. So let me tell you how it works.

Earlier in the week, I started veneering the small sides of the box. They were an easy way to start off.   All I had to do was lay the piece of plywood on the sheet of veneer and trace around it with a pencil, then use my marking knife to trace over the lines in multiple passes until I got a nice clean cut. (Yes, I know,,, I should have used a veneer saw, but don’t have one of those either okay!) Next, I applied a very liberal amount of Titebond III glue to the plywood side and set the piece of veneer in place. I had a number of small pieces of blue painter’s tape ready to put around the edges to hold down the veneer and keep it from curling up.

Now is the time that I wish I had a vacuum press. So what is a vacuum press you ask? Imagine a great big zip-lock bag with a piece of plywood with veneer on top of that inside the bag. To adhere the veneer to the sub-straight (plywood), you need two things; the glue, and the clamping pressure. The veneer is glued on, and then the piece is put into the big plastic bag and all the air is sucked out creating a huge amount of very even clamping pressure.

The vacuum pressure can be achieved by the use of an electric vacuum pump or with another type of device called a ventrui, but there’s no need to go into that detail here.

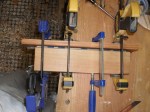
To get the clamping pressure I needed, I placed the veneered pieces between two large pieces of wood and used clamps to create even clamping pressure to make sure the veneer stays flat. I let the glue cure for a full 24 hours.

Next, I used a block plane to trim off the excess veneer which was a very quick job. Then I used the block plane to chamfer the edges on the back side of the plywood so they would slide easily into the grooves of the rails. Now I am waiting for the last piece to cure in the clamps.

cutting out the veneer

cutting out the veneer

Veneer taped up to plywood

Veneer taped up to plywood

Clamped up

Clamped up


Now comes the hard part. The marquetry work. First, I have to draw out the design, then make the cherry veneer sheets that will become the letters. But before I start the doing the marquetry on the front, I am going to run some tests on a small piece of 1/8 plywood that I veneered to make sure I have the system down pat. I have come too far to make a mistake now.

More to come……

Posted in In Yaakov's Workshop | Tagged , , , , , | 6 Comments

Another step forward

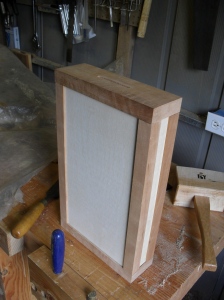
Another step forward today. The panels for the front, back, and sides were sized and fit into place. So now you have a basic idea of what this thing is supposed to look like. I used 1/8″ birch plywood for the panels, and I used my hollow mortise chisel machine to cut the 3″ x 1/4″ slot for the money.

The panels are in place

The panels are in place


The next challenge is to apply the veneer. It is too cold in the shop for my glues to set, so after Purim guests leave, I’ll have to move the veneering operation into the house where I can get a steady temperature. I think the contrast of the birds eye maple veneer and the cherry will look great.

More to follow…

Posted in In Yaakov's Workshop | Tagged , , , | 1 Comment

Feelin’ Groovey

Once again, I was confronted with multiple options to complete a task. And once again, I took the old-fashioned route mainly for the sake of accuracy versus speed.

Here’s the case: The top and bottom need to grooves to receive the floating panels that are held within the rails. The groves are only 1/8″ back from the front edge of the top and bottom pieces. That is a very narrow margin of wood. I could have used my router table with a 1/8″ dado bit, then set up the stop blocks, then run a bunch of tests, but I was really afraid that the end grain would blow out on the short sides. And what if something went wrong? I’d have to go back and remake an entire piece. Therefore, I decided that I should approach this with careful use of hand tools.

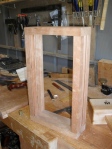
The box showing the grooves in the rails

The box showing the grooves in the rails


The steps were really quite simple. First, I used a marking gauge to score the wood for the outside and inside diameter. Then I went back over those lines with my marking knife to cut more of the fibers. Next, I used a wide chisel to further deepen the scoring cuts. Now, using a 1/8″ chisel that is shaped like a mortising chisel, I notched in numerous vertical deep cuts within the lines. All I had to do next was to hold the 1/8″ chisel at a 45 degree angle and push out the waste.

Making the grooves

Making the grooves

Grooves complete!

Grooves complete!


I have seen Roy Underhill do this many times on the Wood Wright Shop. And it all worked out quite easily. The grooves only had to be 1/8″ deep so it did not take too long to make the grooves for the top and the bottom. I wish I would have had a 1/8″ blade for my router plane, that would had made the operation much faster. I do have a plow plane, but I need a lot more practice with that plane. I am still not very good with it yet.

Next step: cut the panels to the right size, apply the veneer and……. All of this next time on Artisan’s Call.

Posted in In Yaakov's Workshop | Tagged , , , , | 1 Comment

A mix of old and new

As I have stated many times before, I like to call myself a Modern Traditionalist. Today, I want to show you how I use a mix of the old and the new.

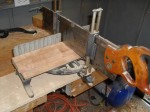
When cutting small to medium sized pieces to length, I prefer to use my antique miter saw. I had the saw sharpened by a real “sawyer” and that makes a hellva’ difference. My miter saw is very accurate and it leaves a near perfect finish.

My antique miter saw

My antique miter saw

No saw marks at all

No saw marks at all


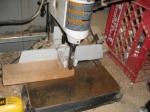
Now, when it comes to making mortises, unless they are HUGE, I am going to use my hollow mortise chisel machine. I could drill the holes then chisel out the sides and hope that I get them perfectly square, but the power tool really can do it better than I can by hand. But I could do it if I had too.

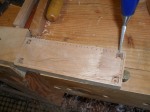
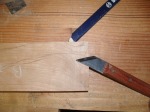
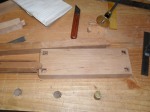
To layout the mortises that will receive the rails, it was vitally important that they be perfect so the rails would be flush with the top and bottom piece. So I used my marking gauge, my combination square, and my scribing knife to layout and two sides of the mortise and then scribe a 45 degree angle. The diagonal line was used for a location marker for the tip of the brad point drill bit. I could put the tip of the bit on the diagonal line, then move it forward or backward on the line to get the chisel points right on the scribed lines for the mortise. Then a quick whack or two with the joiners mallet made the referencing marks that I would use when I set the piece of wood on the hollow mortise chisel machine. Then batta boo batta bing, drill the mortises and your done!

Layout the mortises

Layout the mortises

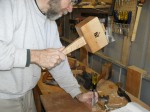
One good whack to make the reference marks

One good whack to make the reference marks

Drill the mortises

Drill the mortises


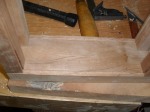
Viola! Mortises!

Viola! Mortises!


Next step, fit the tenons into the mortises to make sure they line up right and fit tight. More on that…..next time.

Posted in In Yaakov's Workshop | Tagged , , | 1 Comment

So we start again

Today I started construction on a new commission. It is a tzedakah box done in a style I have never made before. Generally, I make these with solid wood sides, but since this particular box has marquetry on the front, I had to make the sides of the box very thin, since the dimensions of the box are rather thin itself.

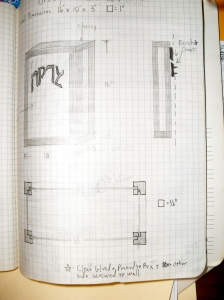
I know this is an awful photo. My scanner stopped working!

I know this is an awful photo. My scanner stopped working!

The box will be 16″ tall, 10″ wide (yes, golden ratio), and only 3″ deep. It is meant to be hung upon a wall. I will use a french cleat system for that. (more on this later). To make this more interesting, instead of using a solid wood sides, I am going to veneer 1/8th” birch ply with a lovely Bird’s Eye Maple veneer. The marquetry letters will be done in cherry. Normally, I do marquetry with 3/32″ thick material, so it will be interesting to see how the scroll saw does with the thicker material. Needless to say, I am going to practice before I start on the real deal.

The construction of the box will be a solid top and bottom, with rails and floating panels for the sides. The top, bottom and rails will be made from cherry which will contrast nicely with the Birdseye maple. So let’s get started!

First, I had to pull some cherry out of the lumber rack, and I had a couple of chunks of rough cut cherry. I found four pieces and used a hand saw to get them to approximate size. Then I flattened one side with various hand planes, then made one thin side perpendicular to the flat size and made sure they were at 90 degrees to each other. With that done, I ran the pieces though the thickness planer to get all of them to 1″. And then I used the table saw to rip them to the proper width. To clean up any burn marks from the table saw blade, I went over the pieces with a smoothing plane. When I was done, I had the top and bottom, and four rails.

The rails are one inch square. To hold the panels in place, I used the table saw to make 1/8″ groves, 1/8″ away from the front edge of the rail. Easy! To attach the rails to the top and bottom, I am using mortise and tenon joinery. I cut the tenons by hand. See the photos:

Marking in the tenons for the first class saw cut

Marking in the tenons for the first class saw cut

Cutting the tenons using my bench hook

Cutting the tenons using my bench hook

Popping off the waste after the sawing was done

Popping off the waste after the sawing was done

There are a number of challenging steps to follow. Stay tuned….

Posted in In Yaakov's Workshop | Tagged , , | 3 Comments

Grandpa’s Workshop – Book Review

I admit it, I am a fan of Chris Schwarz’s Lost Art Press publishing company, and I have enjoyed every book I have ordered from them. Months ago, they made an announcement about a children’s book to be published called “Grandpa’s Workshop” by Maurice Pommier. I knew right away this would be a great book for me to read to my son.

My boy is three years old and his is crazy for tools and building things. Before he was three, he could name most of the tools in the Woodcraft catalog. In the midst of a meltdown, I can generally calm him down by offering to look at a woodworking magazine together or watching a woodworking show that I have DVR’d. So this book was perfect for him (and me). BTW, my two oldest girls (10 and 8) have read the book and liked it too, so it is not just for boys.

Here is the official description of the book from the Lost Art Press website:

This 48-page book was translated this year for us by Brian Anderson, an American-born writer and woodworker who lives and works in France. It is ostensibly a book for children, though the stories, lessons and drawing style will appeal to anyone who has an appreciation for the natural and the fantastical.

Pommier paints an unbroken line of craftsmen from a French family, and he traces the history of their lives and their work through their tools and the stories of them being handed from one worker to the other – against the backdrop of colonization, the gold rush, World War I and the time when Dragomir the dragon wreaked havoc in the Black Forest.

The tale is told through the eyes of Sylvain, the youngest of the woodworkers in the family, as he spends his vacation in the shop of his grandfather, whom he calls Pépère. Sylvain wants to learn all about the hand tools in Pépère’s shop and the elves who hide amongst the shavings, benches and tool chests there.

As an added bonus, I am getting good practice with my French names. Thank goodness my wife speaks French!

I find the stories very interesting, but my son likes the pictures the best. There are loads of illustrations of hand tools, and he really enjoys identifying them. So not only does he know the name of all my power tools in my shop, he has now learned the names of tons of hand tools too.

If you have a child or grandchild who likes being in your workshop, then get this book and enjoy a good read together. I have included a link for the Lost Art Press above, so order the book for a holiday or birthday gift, and enjoy some good story time with a child you love.

Enjoy!

Posted in Book Reviews | Tagged , , , , | 2 Comments

Keepin’ up the skills

Well, I am still commission-less, and I am still broke, so I can only work with the scraps I  left on the lumber rack. As you well know, you must practice to keep your skills sharp, so a bit of practice I had.

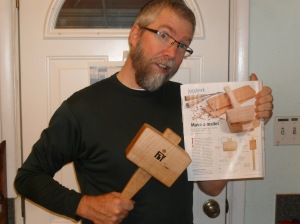
I received a copy of the “Fine Woodworking, Tools & Shops” annual magazine issue, and whilst flipping through the pages, something caught my eye. There was an article entitled: “Make a mallet, build a great one while honing your hand tool skills” by Michael Cullen. This looked like a great little project to keep my skills sharp.

Now I already have an antique jointer’s mallet that I really like, but one day, my son might want his own mallet, so why not make another one?! To me, mallets are like tongs, which begs the question, if you need tongs to make tongs, who made the first set of tongs? The same with this project, to create the through mortise in the mallet’s head, I really needed a mallet. So who made the first mallet? Thank goodness I already had one!

It just so happened that I had some pieces of hard maple that were the perfect thickness to make the head, and I had to use red oak for the handle. I’m not going to bore you with how I made the mallet because you could look it up for yourself on-line, besides there was nothing special about making this. That being said, you did have to have a wide variety of hand tools to make the project (by hand): Rip saw, cross cut saw, tenon saw, a small cross cut back saw, brace and bit(s), mortising chisel, a variety of firmer chisels, jack plane, smoothing plane, block plane, and a spoke shave.

The design of the mallet handle will prevent the mallet head from “flying off the handle” and once I had the handle set in place it was in there like a rock, but I was still afraid it might “move a bit” and slide down because of my non climate controlled workshop. So I drilled a hole all the way through the head and handle and made an oak pin to hold the two parts together for sure. Better to be safe than sorry later.

Before I did the final sanding, I branded my logo onto both sides of the mallet head to mark the tool as mine and give it a little touch of flair. After it was sanded to 320 grit, I applied a coat of Danish oil, then shellacked it.

It is a little bit heavier than my other mallet so the handle shape was important, thus I used the spoke shave to make the handle fit my hand nicely. Boy, I did enjoy using a spoke shave! I don’t know what it is about that tool, but it is fun to use.

Just like making the dressers and chests you use to hold your own clothes, making your own tools give you a sense of accomplishment and pride. I like eating off the table I made, and sleeping in the bed that I made, and I can’t wait to use my new mallet, that “I made!”

Just me and my mallet


Do you feel that sense of pride too?

Till next time,

yaakov…..

Posted in In Yaakov's Workshop | Tagged , , | 2 Comments