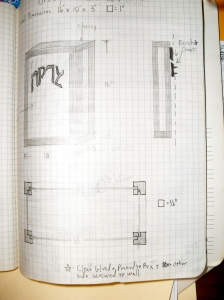
Today I started construction on a new commission. It is a tzedakah box done in a style I have never made before. Generally, I make these with solid wood sides, but since this particular box has marquetry on the front, I had to make the sides of the box very thin, since the dimensions of the box are rather thin itself.
The box will be 16″ tall, 10″ wide (yes, golden ratio), and only 3″ deep. It is meant to be hung upon a wall. I will use a french cleat system for that. (more on this later). To make this more interesting, instead of using a solid wood sides, I am going to veneer 1/8th” birch ply with a lovely Bird’s Eye Maple veneer. The marquetry letters will be done in cherry. Normally, I do marquetry with 3/32″ thick material, so it will be interesting to see how the scroll saw does with the thicker material. Needless to say, I am going to practice before I start on the real deal.
The construction of the box will be a solid top and bottom, with rails and floating panels for the sides. The top, bottom and rails will be made from cherry which will contrast nicely with the Birdseye maple. So let’s get started!
First, I had to pull some cherry out of the lumber rack, and I had a couple of chunks of rough cut cherry. I found four pieces and used a hand saw to get them to approximate size. Then I flattened one side with various hand planes, then made one thin side perpendicular to the flat size and made sure they were at 90 degrees to each other. With that done, I ran the pieces though the thickness planer to get all of them to 1″. And then I used the table saw to rip them to the proper width. To clean up any burn marks from the table saw blade, I went over the pieces with a smoothing plane. When I was done, I had the top and bottom, and four rails.
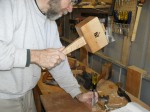
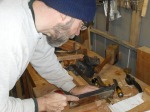
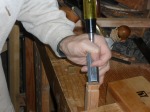
The rails are one inch square. To hold the panels in place, I used the table saw to make 1/8″ groves, 1/8″ away from the front edge of the rail. Easy! To attach the rails to the top and bottom, I am using mortise and tenon joinery. I cut the tenons by hand. See the photos:
There are a number of challenging steps to follow. Stay tuned….


Good to see you back in the saddle, Yaakov! I’ve just made a copy of a clock case (and turned bezel) from 1740. The first dovetails I’ve but in about fifteen years! Took longer than it should have but I enjoyed making it. Good luck with the box, my friend.
Thanks Andy, I have not heard much from you lately either. I have a feeling we are both burning out of blogging. Be well, yaakov….
That sounds like quite some box. Can’t wait to see it.